This week we had a truly wonderful trip to the dentist, it was a bit out of the ordinary and one of the best all time dental visits that we have ever had.
One of the things that I worried about when I decided to try my hand at an early retirement was the loss of our medical coverage. Dental coverage has gotten so expensive that it was one of our great fears that we would not be able to maintain our dental health. Add to this the fact that we are now hitting the age when most problems are likely to occur it was quite a leap to head out without a safety net.
Not long after I retired, one of my fears became reality, I had a root canal that failed. My last dentist had given up her practice and I was in the middle of a dental emergency with no dentist. What to do. I called a couple of offices to see about an emergency appointment and was told that I could not be seen without first having an examination, which starts at $75.00 and goes up if there are x-rays needed. All of this to to confirm that the tooth that I knew was damaged was in fact damaged. I left the office that day $125.00 lighter and had an appointment for 2 weeks in the future to look at the tooth. Two painful weeks later and another $400.00 I had my tooth fixed. Luckily the specialist that they booked me with was the one who did the original work and I got it done for half price under warranty. I also had the bad news that I needed multiple crowns and should be booked for a more extensive checkup. I thought how are we going to be able to do this. Fast forward to January of this year.
At the first part of January we decided to take a leap of faith and call Dalhousie Medical School and try and get an appointment in the Dental Clinic. The wait time was no longer than a regular dental office and we were scheduled in for the middle of February.
It was a bit unnerving to head into the city with no idea of what to expect, but our fears were soon put to rest. We were in line with a group of other people in for the first time. We registered for our appointment, paid our examination fee of $55.00 each, were given directions to the clinic and went to the next desk. Once we arrived at the clinic, we were given a folder of standard forms and medical questionnaires to fill out. Once these forms were filled out we were assigned to our student. There are about 45 Third-Year Dental Students enrolled at Dalhousie and each one had a patient to examine.
We were given a very professional dental exam, asked all the pertinent questions and then it was off to X-ray. The student lined me up in the chair and proceeded to take all the necessary x-rays of my mouth, the professors popping in to observe and comment. Then it was back to exam room where the x-rays were viewed and the more in depth oral exam took place, much as in any conventional office. After the student finished the exam, a faculty professor came in and double checked the exam and made comments to the student. My student had not missed a thing.
After the exam and x-rays, it was time to get the plan for future dental work. Remember all those crowns that I was going to need, turns out that was not really the case. It turns out that I could have them if I want them, but my fillings are fine and strong for now. I will probably need to get them done at some point as they will deteriorate over time, but that time is not now. And the good news is that the cost to have them done at the school will be about 40% of the cost of having them done at a conventional office.
Our next step will be for the school to assign us to a Fourth -Year student and a Hygienist to take care of any work going forward. Our cleaning that we have scheduled will by about $100.00 as compared to the estimate I was given of $260.00 at the conventional office. Once you multiply that by 2 for the number of people in the family, it really paid for our gas to drive in.
I am really pleased that we had a very professional experience at the school and also that the costs are going to be much less than we hoped. We came away from our experience with nothing but good feelings and impressions and it is a great added bonus to know that we also helped someone to get the practical experience that will help them later in life.
This was definitely a win-win situation if ever I have seen one.
The phone number for the Dental Clinic at Dalhousie Medical School is 1-902-494-2101.
Friday, 28 February 2014
Sunday, 16 February 2014
Adding a little heat to your love life.
Sometimes we are looking to add a little heat or a little spice to our love lives. If that is what you are searching for, look in your kitchen. That is where the stove and the spice rack are located. If your idea of a romantic evening is a trip to the local restaurant, I wish you well. If you want to try a special meal that will bring you closer together, try cooking it together. It is a really nice bonding experience and might learn a new skill. A meal cooked together with love will taste so much better than any meal cooked by a faceless chef in an anonymous restaurant kitchen.
For Valentines day we decided to head to the kitchen to prepare a really tasty gourmet supper that is not terribly difficult, but will taste amazing.


 For the asparagus, just snap off the woody ends of a pound of asparagus and place in a greased baking dish one layer deep. Drizzle with olive oil and dot with a little butter. Season with salt and pepper then top with grated Grana Padano or other hard parmesan style cheese. Bake in the oven at 400F for 15-20 minutes. Remove and place on plate beside pasta.
For Valentines day we decided to head to the kitchen to prepare a really tasty gourmet supper that is not terribly difficult, but will taste amazing.
Pepper Lime Fettuccine
Lobster Alfredo
Grana Padano Asparagus
Molten Lava Cake
If this seems like a meal that you would love to see on your menu keep reading. The recipes are coming. We start with the dessert as it needs a bit of prep time to cool between stages.
Molten Lava Cake
Center
2 oz or 2 squares Dark chocolate
¼ cup heavy cream
Cake
4 oz or 4 squares Dark chocolate
8 Tbsp butter
2 whole eggs
2 egg yolks
1/3 cup sugar
½ tsp vanilla extract
¼ cup flour
To make the centers, melt chocolate and cream in a double
boiler or microwave on medium power. Whisk gently to blend. Refrigerate for 2
hours or until firm. Roll into 6 balls and refrigerate until needed.
To make the cake, heat oven to 400F. Coat six 4oz
ramekins with butter or spray with no-stick spray. Melt chocolate and butter in
double boiler of microwave on medium. With a blender, whisk eggs, egg yolks,
sugar and vanilla on high speed for about 5 minutes or until thick and light.
Fold melted chocolate and flour into egg mixture until just combined. Spoon batter into ramekins and add a
chocolate ball to the center of each one.
Place ramekins on a cookie sheet and bake for 15 minutes
or until cake is firm, this keeps any potential spills contained. Remove from
the oven and let rest on the counter for 5 minutes. Run a knife around the edge
of the ramekins and invert onto a plate. Top with whipped cream or a spoon of
ice cream and serve.
We used stainless steel prep bowls to cook the cakes and
they turned out fine.
Next we have the sauce, which can be reheated to add to the pasta. It keeps really well and reheats well for leftovers and can also be frozen to have later.
Lobster Alfredo
1 medium onion finely chopped
2 cloves garlic minced
1/3 cup butter
1 can or 12 oz lobster meat well drained
¼ cup white wine
1cup heavy cream
1 cup grated Grana Padano or other hard parmesan style
cheese.
Pinch of nutmeg
Salt and pepper to taste
Chop onion and mince garlic and sauté in butter over
medium heat until tender. Add lobster and continue to sauté until the sauce
takes on a nice orange color from the lobster. Add white wine and cook until
liquid is evaporated. Pour in cream and heat until sauce starts to thicken
slightly. Add cheese and stir over heat until cheese melts. Season with nutmeg,
salt and pepper to taste. Pour over
plated pasta. This makes a fairly thin
sauce which helps to keep it from being too rich. If you want a thicker sauce,
cook it longer before adding the cheese or you could add some flour to the
sauté stage to make a roux which will help thicken the sauce.
The pasta will come next.
 Pepper Lime Fettuccine
2 cups all purpose flour
½ tsp salt
2 large eggs
¼ cup water
1 tsp olive oil
Crushed pepper
Zest of 1 lime
Mix flour and salt and make a well in the mixture. Add
eggs, oil and water and mix thoroughly.
Knead dough well until smooth and elastic. Wrap in plastic wrap and let rest about ½
hour.
Divide dough into 4 parts and roll out thin on well
floured surface, or run it through a pasta maker at increasingly thinner
settings. Once the dough is rolled out
thinly, either cut in desired strips with a knife or pass through the
fettuccine cutter on the pasta maker.
Boil the pasta in a large pot of seasoned water, cooking until the pasta
floats to the top. Drain and cover with sauce.
For the asparagus, just snap off the woody ends of a pound of asparagus and place in a greased baking dish one layer deep. Drizzle with olive oil and dot with a little butter. Season with salt and pepper then top with grated Grana Padano or other hard parmesan style cheese. Bake in the oven at 400F for 15-20 minutes. Remove and place on plate beside pasta.
This was a fantastic meal, one we truly enjoyed more than any restaurant meal we could have had that day. It was fun to cook together and made the whole afternoon of preparation part of the celebration of the special day.
Try cooking together and yo may find the ingredients in the kitchen to add a little heat and spice to your love life.
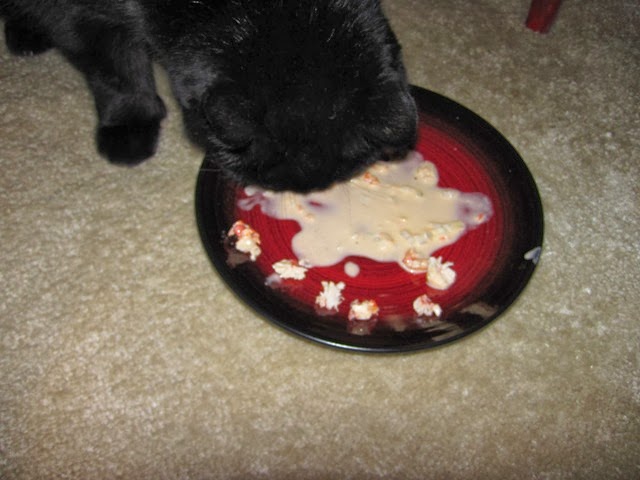 And don't forget the pets when you make a meal for that special someone.
And don't forget the pets when you make a meal for that special someone. Thursday, 13 February 2014
The best laid plans......

Today was another snow day in Nova Scotia, one in a long list of snow days that we have had this winter. As a day not fit for much else, we decided that it would be a good day to get caught up on some baking. And since we were having a Curried Vegetable Stew for supper, it seemed like the perfect day to make another batch on Naan Bread. Naan Bread is one of our favorite fast breads to make, it takes about an hour and a half from start to finish. As an added bonus it helps to heat the kitchen on a cold blustery day.
Naan is a leavened flat bread that is kept moist by using yogurt in the dough and a thin coat of butter to protect it after it is finished tanning in the oven.
Naan Bread
2 tsp dry active yeast1 tsp sugar
1/2 cup warm water
2 1/2 -3 cups flour
1/2 tsp salt
1/4 cup vegetable oil
1/3 cup plain Greek yogurt
1 large egg
In a small bowl, combine yeast, sugar and water, stir to dissolve and let sit a few minutes until frothy on top then stir in oil, yogurt and egg until evenly combined.
In a medium sized bowl place 1 cup flour and salt. Add in wet ingredients and stir until until well combined. Add more flour 1/2 cup at a time until you can no longer stir it; about 1- 1 1/2 cups later.
Turn the ball of dough out onto a well floured counter top and knead for about 3 minutes adding flour as necessary to keep the sough from sticking. The dough should be smooth and soft, but not sticky.( we used the stand mixer for this and it turned out great)
Loosely cover the dough and let rise until double in size(about 45 min). Turn the dough out onto a floured counter top and cut into 8 equal pieces and for into balls.
We used a pizza stone to cook the bread, it needs to be heated to 500F for approximately 15 min. Or you can use a heavy bottomed skillet.
 Roll the ball of dough into a circle approx. 15cm(6 in) in diameter and place on the cooking surface.
 Cook until the bottom is golden brown and the top is covered in small bubbles.
 We prick any really large ones so that they deflate. Flip the dough and cook until golden brown.
  Serve plain or brushed with butter( my vote) and topped with herbs if you like. Brushing with butter as soon as they come out of the oven keeps the bread soft, and tastes good too.
 As so often happens, there is an unexpected bump in the road. As we placed the second batch of bread on the stone and closed the door, there was a bang from the oven.The stone had split. We have had this stone for many years and it has given us many batches of wonderful bread and pizzas, but it had finally had enough and quit in the middle of the job. Now what do we do, the stone is at 500F and pulling it out and putting it on the counter is not an option. We took a deep breath and decided to finish the batch of Naan on the broken stone, not something I would really recommend, but in the face of a small disaster we do what we have to.
Naan is a wonderfully versatile bread, we use it as a side dish for our curried stew, we freeze them and pull them out of the freezer to make panini and use them in wraps. They have so many uses that we constantly find that we are needing to bake another batch and have taken to making a double batch to save time. It is a good thing that we have a spare stone, since I don't think this batch will last very long. We tried one today brushed with butter and sprinkled with Cinnamon sugar, it was remarkably close to a Beaver Tail. Mmmmm.
We hope that you enjoy the recipe.We sure do.
Sunday, 9 February 2014
An old fashioned winter.
 This year has seen a return of what we older members of society fondly recall as an old fashioned winter. That is one with lots of snow that is not melted by rain soon after it falls.The lakes and rivers freeze over and you see people out playing on the ice. It has been just such a winter for us this year.
You might think it would be problematic having a snowy winter when you live in a cottage in the woods, but it seems to be just the opposite. This winter has been a great winter to be able to get out and enjoy the best that the winter season has to offer. The roads are frozen and the potholes are filled smooth with ice. The lakes are frozen solid and there is snow to play in, once the shoveling is done.

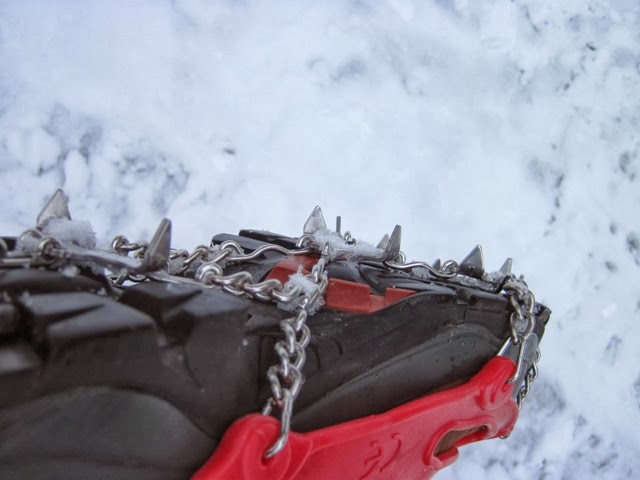 This year has allowed us to get out our ice cleats,snowshoes and our skis and go for hikes on roads that at another time are wet, muddy and swampy.
 It allows us to get a perspective of cottage life that is not often experienced. Winter in the country is a beautiful time of the year. It is quiet, clean, peaceful; and you have the sense of having the world to yourself. It is hard at times to believe that you have neighbours at all.
  After a long ski on the lake it is so quiet that it feels that you can hear your heart beating and the freshly invigorated blood flowing through your veins. It gives you a fresh lease on life, the crisp clean air, the squeak of frost as you tramp through the snow, the low booming of the ice on the lake and the smell of woodsmoke in the air. The last one is sometimes the best, because you know that you will soon be able to curl up in front of a nice warm fire to warm your chilly nose and wiggle your toes in your wool socks as you settle in to read a few more pages of your favorite book as a few flurries drift slowly to the ground painting the area with a new coat of purest white.
 This winter has also brought some of the most beautiful sunrises that I can ever remember. The sky painted in so many hues of red, reflected on the ice or snow so that at times it seems as though the world is on fire. The show is fleeting, last such a few short minutes that you are amazed that you can experience so much beauty in so short a time. It is sad to see the colors fade, but you know that in a few days you will be treated to another of mother natures greatest shows. It truly makes it worth waking up for, to experience the beauty of nature in the morning.
 Night time is another chance to experience the majestic beauty as the moon on a fresh dusting of snow makes the countryside seem to glow with reflected silvery light. The trees, bare of leaves casting ghostly crisp shadows on the snow is a stark contrast to the fiery birth of the day, but no less beautiful.
The sights, sounds and smells of a fresh clean winter are ever changing. And far from feeling claustrophobic, we find that the beauty of winter is enlivening and full of new experiences. We never have to worry about cabin fever when there is so much to experience. We wonder how we will ever find the time to get to do everything that is on the menu of things to do on the winter. Winter seems to offer as many choices of activity as summer does, and many of them seem to revolve around the lake, regardless of the season. Retirement has allowed us the time to relax, sit back and enjoy the beauty around us.
Instead of hating winter, we are reveling in it, but like all things it comes to an end. We love all seasons and each one is just long enough to enjoy and also long enough to make us look forward to what is around the corner. We love each season as it comes and love the change that a new one brings. Winter will soon be gone, so enjoy it while it is here.
Sunday, 2 February 2014
Inner Handyman
Years ago Steve Smith in his character of Red Green used to say, "If the women don't find you handsome, at least they should find you handy". It is a truth in life that it is easier to make yourself handy than it is to make yourself handsome. Being handy is just a matter of learning a skill and repeating it until you become proficient. It is much easier to be a handyman than it is to become a craftsman. The last 10% of skills in any job is usually the separating factor from handyperson to craftperson, because in truth the home projects don't have to be a man's domain, anyone can do it. That last 10% in skill is also where most of your money will go in any renovation project. You will pay handsomely for that last 10%, so you can be handsome or handy, either way the job will get done. If you are the type of person who demands perfection in everything, you probably won't enjoy the handyperson journey. If you can live with a few minor blemishes on life, grab your tools and get started.
Our first step in any handperson project in the house is a discussion, lots and lots of discussion. That's a good thing. We talk out the project to make sure we both have the same vision of the end result. We don't often start with the same idea, but we usually end with the same expectations. We are not professional designers, so it takes a lot longer to get there, but this phase is usually free, not so if you are paying for that extra 10% in skills. We talk over the plan and get out the graph paper to draw out our vision. We have even grabbed the chalk and drawn an outline of the project on the floor. This can save having someone draw a chalk outline around you if the discussion becomes too heated. If this is the case maybe it is time to pay for the pros to step in.
It is important at this stage to find your comfort level. I would recommend not starting off with building your own house from your own drawings. It is time to figure out which parts of a job you feel you can handle and which ones you are scared to death of, and it is also a good time to do your research if you are doing a job for the first time. You can cause a lot of damage by entering into a project blindly. If you are not sure of something, ask someone who has more experience.
Once we have this done, we have to figure out the materials. Don't fret about it too much, you won't get it right, no one does, not even the pros. Something always pops up. But, since you are maybe retired like me, your time doesn't have a price tag on it, and the conversation at the lumber yard is usually entertaining and informative.
Now that you have the materials home it is time to start the project. Remember, measure twice cut once. We have accumulated a number of tools over the years to help with our projects. Our rule of thumb is to buy a tool if it saves money and we will use it again. If it is a one time deal, you should rent, then you don't have to store the tool when you are done. Power tools are faster, and more dangerous. Take the time to read the directions on any tool and familiarize yourself with all the options that the tool has, and always, always wear the proper safety equipment.
Once you have completed your project, step back and admire your work. You have earned the satisfied feeling you are now experiencing. Remember the job may not be perfect, but it is your job, you did it. You will get better with each project you tackle. Start small and build your skill set. Don't be afraid to ask questions if you are stumped, that is how we all learned to tackle ever bigger projects.
Subscribe to:
Comments (Atom)